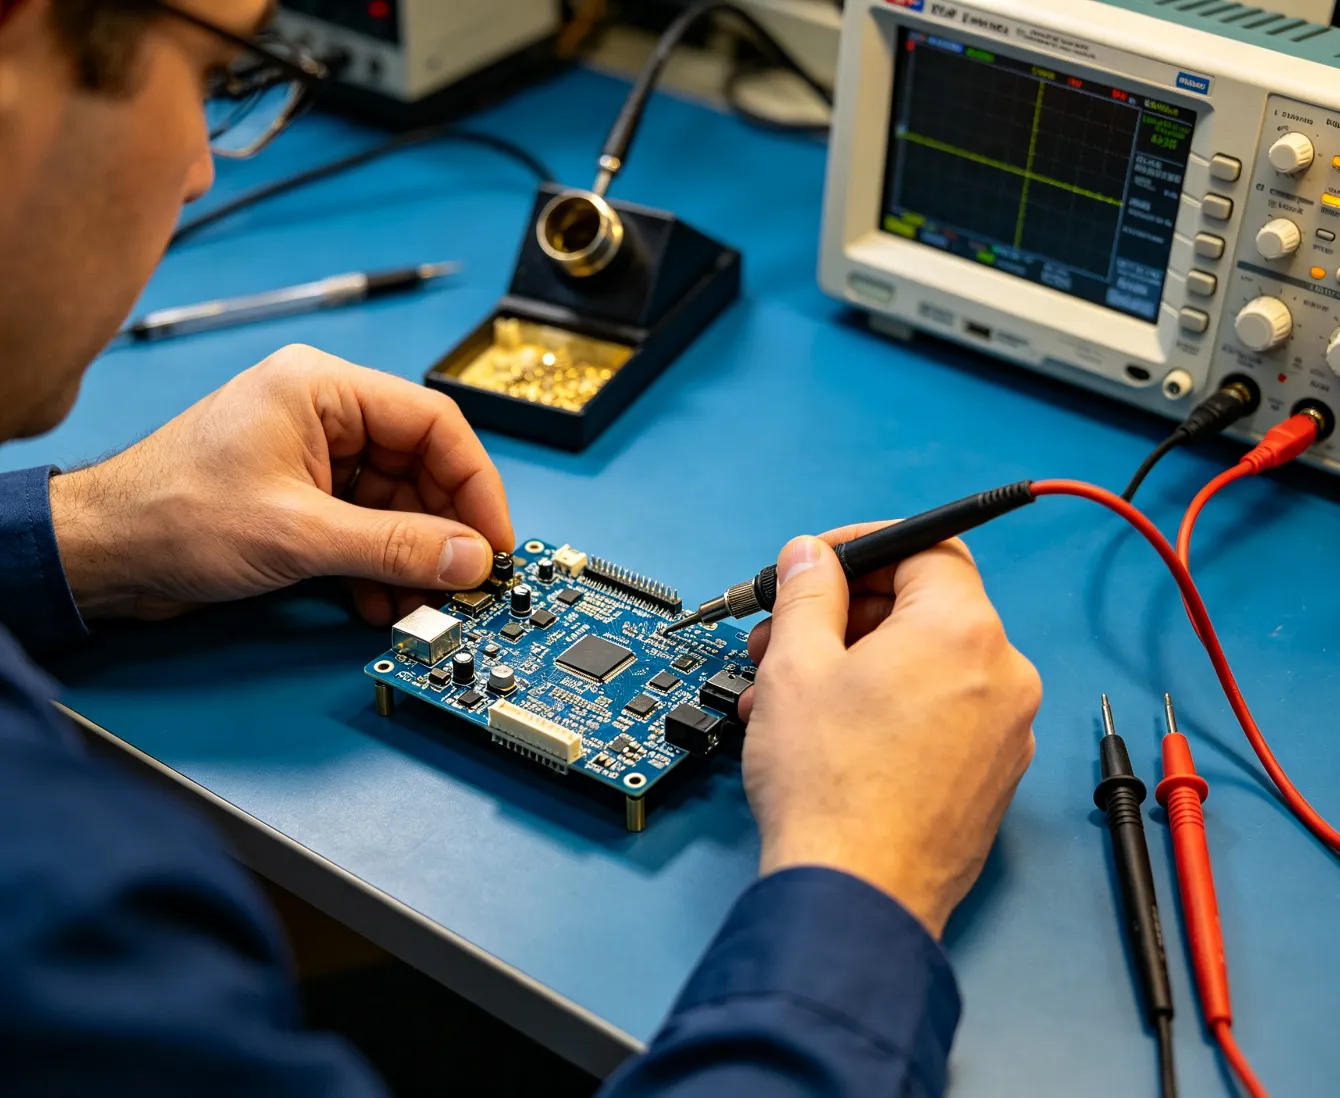
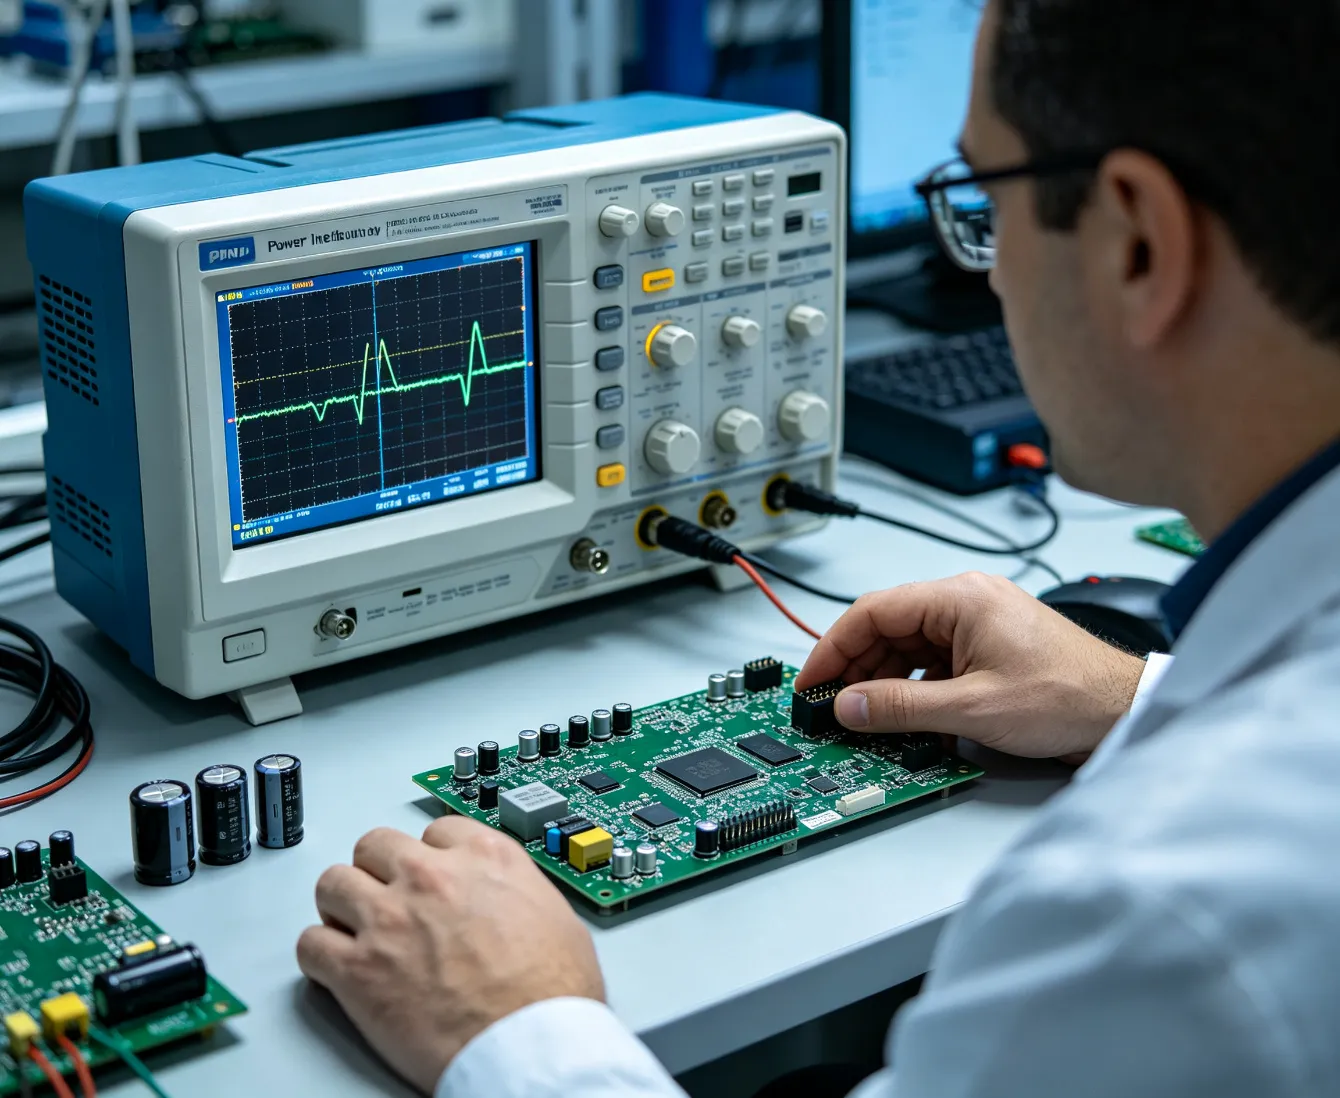
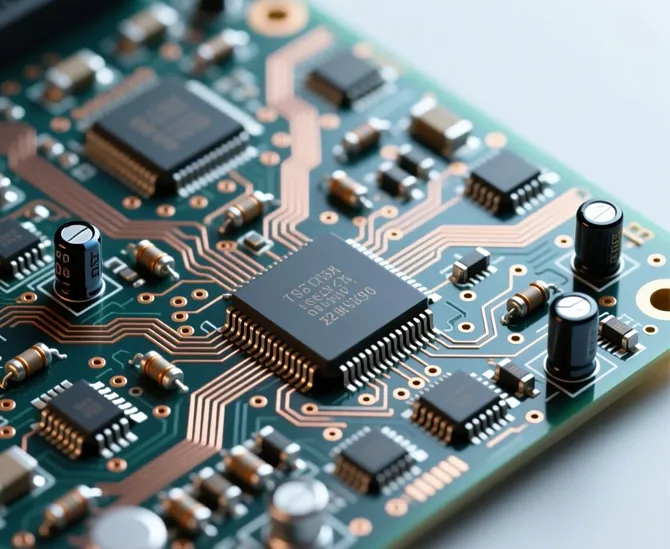
Prototype Strategy Comes Before Prototype Fabrication
Before manufacturing anything, ask:
What Do We Need to Learn?
Possible unknowns include:
Architecture
Circuit Function
Signal Integrity
Power Stability
RF Performance
Thermal Behavior
Mechanical Fit
Sensor Accuracy
Firmware Timing
Manufacturability
Assembly
Cost
Reliability
Different Questions Require Different Prototypes.
Do Not Build the Whole Product to Answer One Small Question
Suppose the uncertainty is:
Will this antenna work inside the aluminum enclosure?
You may not need:
final cloud platform
final UI
production harness
complete box-build
to answer that question.
Prototype the Risk — Not the Entire Product.
Risk-Driven Prototyping
Rank unknowns by:
×
×
Cost of Discovering It Late.
Test the Most Dangerous Assumption Early.
Cheap Question First
If a $200 experiment can reveal a problem that would otherwise require:
A $50,000 Tooling Change,
run the experiment first.
Prototype Economics Is Risk Economics.
Prototype Is Not One Stage
A complex electronics program may contain many different prototypes:
Prototype Is a Sequence of Learning Vehicles.
Proof of Concept — POC
A Proof of Concept answers:
Can the Fundamental Idea Work?
It may use:
evaluation boards
temporary wiring
simplified mechanics
preliminary software.
POC Optimizes Learning — Not Production Readiness.
POC Can Be Ugly
A POC may look nothing like the final product.
That can be completely correct.
Appearance Is Irrelevant if the Objective Is Physics.
POC Must Still Be Intentional
Messy does not mean:
Uncontrolled.
Document:
configuration
components
firmware
assumptions
measurements.
Experimental Hardware Still Needs Configuration Control.
Architecture Prototype
Architecture prototype asks:
Does the major system partition work?
For example:
Processor
Memory
Sensor
Wireless
Power
Validate the System Boundaries.
Evaluation Boards
Vendor development boards can accelerate architecture evaluation.
They are excellent for questions such as:
processor capability
software stack
peripheral compatibility.
Use Existing Hardware When It Answers the Question Faster.
But Evaluation Board ≠ Product Hardware
Evaluation boards often have:
generous power
large PCB
good cooling
ideal antenna placement
convenient connectors.
Development Platform Success Does Not Prove Final Product Success.
Hidden Evaluation-Board Margin
The vendor board may contain:
12 Layers
Large Ground Planes
Expensive Regulators
Large Heat Sink
while your final product needs:
Small 4-Layer Board
Plastic Enclosure
Battery Power.
Prototype Architecture Must Eventually Converge Toward Product Constraints.
Breadboard
Breadboards can help with selected:
low-frequency
simple analog
logic
experiments.
But they are generally inappropriate representations of demanding:
high-speed
high-current
physical behavior.
Prototype Medium Must Match the Physics.
Flying-Wire Prototype
Temporary wiring can be useful for:
control signals
debugging
simple changes.
But:
Wire Geometry Changes the Circuit.
Especially at high speed or RF.
Daughterboard
A small daughterboard can test:
new sensor
power stage
interface
without redesigning the whole main board.
Modular Prototypes Can Isolate Risk.
Adapter Board
When component/package changes:
before committing to a full system PCB revision.
Circuit-Level Prototype
Sometimes one analog circuit is the risk:
reference
filter.
Prototype the Signal Chain Separately.
Power Prototype
A difficult regulator or converter may deserve a dedicated board.
Validate:
regulation
transient behavior
thermal
EMI-risk inputs.
Power Risk Can Be Retired Before Mainboard Layout.
RF Prototype
An RF front end may deserve a dedicated characterization board.
Separate RF Circuit Performance From Full-System Noise First.
Antenna Prototype
Antenna can be evaluated with representative:
ground plane
enclosure
nearby materials.
RF Prototype Should Include the Environment That Controls RF Physics.
Sensor Prototype
Sensor performance depends on:
electronics
mounting
environment.
The Measurement System Must Be Prototyped — Not Only the Sensor IC.
Mechanical Mock-Up
Mechanical prototypes answer:
Does It Fit?
Can It Be Held?
Can It Be Assembled?
Can the Cable Connect?
Physical Scale Reveals Problems Screens Hide.
Appearance Model
An appearance model can evaluate:
form
proportion
UI placement.
But:
Appearance Prototype Does Not Prove Mechanical Reliability.
Functional Mechanical Prototype
A functional housing prototype may test:
connector alignment
screw access
thermal interfaces.
Prototype the Functional Geometry.
3D Printing
Additive manufacturing is excellent for fast iteration.
But:
Printed Material ≠ Production Material.
Differences can exist in:
stiffness
surface
thermal properties
sealing.
CNC Prototype
CNC can provide more production-like:
metal
stiffness
dimensional behavior
for suitable parts.
Select Prototype Process According to the Risk Being Studied.
Sheet-Metal Prototype
If the production product uses sheet metal:
Prototype the Bend / Assembly Architecture Early.
Soft Tool / Bridge Tooling
As design matures, intermediate tooling may provide more production-like molded parts before final high-volume tooling.
Prototype Fidelity Should Increase as Development Risk Decreases.
PCB Prototype
Eventually the architecture must become:
Real Custom Hardware.
This is a major transition.
Custom PCB Answers Different Questions
A custom board verifies:
Schematic
PCB Layout
Stack-Up
Power Distribution
Clock
Memory
Interfaces
RF
Mechanical Fit
Manufacturability
simultaneously.
Custom PCB Is Where Many Assumptions Collide.
First PCB Should Be Designed for Learning
Do not design the first board only for:
Maximum Density.
Make it:
measurable
debuggable
modifiable
where practical.
EVT Hardware Needs Observability.
Test Points
Expose relevant:
Power Rails
Reset
Clock
Communication
Critical Analog Nodes
where appropriate.
If You Cannot Measure It, You Will Guess at It.
Debug Connector
Provide controlled access for:
programming
debugging
logs.
Prototype Debuggability Should Be Designed In.
UART / Console
A diagnostic console can dramatically accelerate bring-up.
Give the Prototype a Voice.
Status LEDs
Simple indicators for:
can reduce troubleshooting time.
Prototype UI Can Be Engineering Instrumentation.
Current Measurement
Selected power rails may include provisions for:
current measurement
during development.
Know Where the Power Is Going.
Sense Resistor / Measurement Provision
Development hardware can sometimes include optional measurement provisions not intended for final production.
Prototype for Understanding First.
Jumper
Configurable jumpers can isolate:
rail
subsystem
signal.
Isolate the Failure Domain.
Zero-Ohm Link
Strategically placed configuration links can support:
current measurement
alternate routing
subsystem isolation.
Design Rework Options Before You Need Them.
DNP Options
First prototypes may include optional footprints.
Examples:
Alternate Pull-Up
Filter
Termination
Compensation Components
Leave Controlled Tuning Space Around Uncertain Circuits.
Alternate Footprint
Where justified, a development PCB may support:
alternate package/component
for engineering comparison.
Prototype Flexibility Can Save a Board Spin.
But Don't Turn the Board Into a Laboratory Christmas Tree
Too many:
options
stubs
pads
can alter:
signal integrity
manufacturability.
Debug Flexibility Has an Electrical Cost.
Prototype Stack-Up
Early custom PCB should use a stack-up reasonably representative of:
Intended Electrical Physics.
High-speed or RF performance can change radically between different layer structures.
Prototype With Production-Like Materials Where It Matters
If final product depends on:
low-loss laminate
flex material
heavy copper,
validate those technologies early enough.
Material Is Part of the Design.
Prototype Process Capability
Do not accidentally design a prototype using a process that:
Cannot Scale Economically.
Production Direction Matters From the First Board
Current IPC-2221C remains the generic current IPC printed-board design standard, while IPC-2231A provides DFX guidance. Prototype design therefore should not be isolated from future board-design and DFX requirements.
Prototype Should Learn Toward Production.
First Build Quantity
How many boards should be built?
There is no universal answer.
It depends on:
destructive testing
engineering disciplines
software teams
failure probability
rework needs.
Quantity Should Follow the Learning Plan.
One Prototype Is Dangerous
One board works.
What does that prove?
Potentially:
Only One Board Worked.
Multiple Units Reveal Variation
If:
Board 1 works
Board 2 works
Board 3 fails,
you have discovered:
A Distribution Problem.
Prototype Yield Is Data
If only:
6 of 10
engineering samples work:
do not simply repair four and celebrate.
Ask:
Why Was the Design So Sensitive?
Golden Board
A well-characterized good sample can become:
A Reference.
Useful for comparing:
waveform
current
firmware
thermal.
Golden Board Is Not Absolute Truth
One unit may contain:
Lucky Tolerances.
Reference Hardware Should Not Replace Statistical Thinking.
Known-Bad Reference
Sometimes an intentionally preserved failed sample is equally valuable.
Failure Is Engineering Evidence.
Preserve Failed Hardware
Do not immediately:
repair every failed board.
Before rework:
document
measure
photograph
capture logs
where appropriate.
Don't Destroy the Crime Scene Before Root-Cause Analysis.
Failure Capture
Record:
Symptoms
Conditions
Frequency
Hardware
Firmware
“Board Doesn't Work” Is Not a Failure Description.
Repeatability
Ask:
Can we reproduce the failure?
Reproducibility Turns Mystery Into Engineering.
Failure Trigger
Maybe failure appears only when:
Cold
Hot
Network Busy
Motor Starts
Battery Low
Find the Condition That Creates It.
Intermittent Failure
The hardest problems are often:
Not Permanently Broken.
Don't Debug by Random Component Replacement
Randomly changing parts can make symptoms disappear while the mechanism remains unknown.
Fixing the Unit Is Not the Same as Understanding the Failure.
Bring-Up
The first powered custom PCB should follow:
A Planned Bring-Up Sequence.
Not:
plug everything in and see if smoke appears.
For safety and reliability, high-energy or high-voltage systems should be brought up only under the applicable qualified engineering procedures and controlled facilities.
Bring-Up Starts Before Power
Review:
assembly
polarity
critical orientation
expected configuration.
Visual / Manufacturing Evidence Comes Before Functional Assumption.
Rail Architecture
Bring-up should understand:
Which Rail Starts First?
What Depends on It?
Follow the Power Architecture.
Reset
Determine:
Is the Processor Actually Leaving Reset?
Clock
Determine:
Does the Required Clock Exist and Behave as Expected?
Boot
Then:
What Is the First Known Software State?
Progressive Bring-Up
Bring up:
Build Confidence Layer by Layer.
Don't Debug the Cloud Before the MCU Boots
This sounds obvious.
In practice:
Debug at the Lowest Broken Layer First.
Bring-Up Checklist
A repeatable checklist prevents:
missed checks
inconsistent engineer behavior.
Engineering Process Should Be Reusable.
Bring-Up Log
Record:
Date
Board Serial
Firmware
Results
Issues
Prototype History Is Product History.
Board Serialization
Even engineering samples should be individually identifiable where project complexity justifies it.
“The Green Board on John's Desk” Is Not Traceability.
Prototype Configuration
For each sample know:
PCB Rev
BOM Variant
Rework
Firmware
Calibration
One Hardware Revision Can Exist in Many Physical Configurations.
Rework
Prototype rework is useful.
You may discover:
resistor value wrong.
pull-up needed.
signal needs rerouting.
Rework Can Convert Waiting Time Into Learning Time.
Controlled Rework
Current IPC-7711/21D provides industry procedures for rework, modification and repair of electronic assemblies. Prototype teams should treat changes as controlled engineering operations rather than informal modifications.
Rework Is Engineering Only If We Know What Was Changed.
Rework Record
Track:
Board ID
Modification
Reason
Date
Engineer
Result
Every Modified Board Needs a New Configuration Identity.
“Rev A” May No Longer Mean Rev A
If one Rev A board has:
five component substitutions
two traces cut
three wires added,
it is functionally:
Rev A + ECO Configuration.
Temporary Rework ≠ Final Design
A wire modification proving the fix means:
Update the Schematic / PCB.
Do not allow:
permanent prototype hacks
to enter production invisibly.
Rework Confirmation
After modification:
Did the Problem Disappear?
Causality
If three things changed simultaneously:
Which One Fixed It?
Change variables intentionally.
One Variable at a Time
For simple investigations, isolating one change can clarify cause.
Experimental Discipline Matters.
Design of Experiments — DOE Direction
Complex problems may involve interactions among:
component value
temperature
process.
Structured experiments can reveal:
Which Variables Actually Matter.
Prototype Is an Experiment
Therefore define:
What do we think?
What are we changing?
What will we observe?
What result supports the decision?
Engineering Experiment Needs a Question and a Decision Rule.
“Try It” Is Not a Test Plan
Without an acceptance criterion:
Every Result Can Be Rationalized Afterward.
Acceptance Criteria
Before test:
Signal must meet X requirement.
not after:
That waveform looks okay.
Define Success Before Seeing the Result.
Quantitative Measurement
Whenever practical, replace:
looks stable
with:
measured voltage
measured timing
measured temperature.
Numbers Create Transferable Knowledge.
Measurement Uncertainty
Measurement itself has:
accuracy
bandwidth
loading.
Instrument Can Change the Circuit It Measures.
Oscilloscope Probe Loading
High-speed nodes can be altered by:
probe capacitance
ground lead.
Measurement Setup Is Part of the Experiment.
Reference Measurement Point
Define:
Where Is the Voltage Being Measured?
A rail at regulator:
≠
rail at processor.
Correlation
Compare:
vs.
Measurement.
A Prototype Is Where Models Meet Reality.
Model Correlation
If result differs:
don't immediately say:
simulation was wrong.
Ask:
Was Geometry Correct?
Was Material Correct?
Was Boundary Condition Correct?
Was Measurement Correct?
Correlation Is Root-Cause Engineering for Models.
SPICE Correlation
Analog/power circuits can compare:
predicted
measured
behavior.
Improve the Model After Measurement.
SI Correlation
High-speed channels can compare:
simulated
measured
channel behavior where project requires.
Manufactured Geometry Becomes Electrical Evidence.
Thermal Correlation
CFD/model:
82°C
prototype:
94°C.
That difference is valuable.
The Goal Is Not to Make the Prototype Agree With the Simulation by Argument.
Find the missing physics.
Mechanical Correlation
CAD predicts:
0.5 mm clearance.
Prototype touches.
Now ask:
model accuracy?
tolerance?
assembly position?
Physical Fit Is a Model Validation.
RF Correlation
Antenna simulation in free space:
great.
Final enclosure:
poor.
Prototype Revealed the Real Electromagnetic Environment.
Sensor Correlation
Bench sensor:
accurate.
Installed sensor:
biased.
Mechanical / thermal integration changed the measurement.
Embedded Firmware Bring-Up
Hardware prototype needs software capable of:
Exercising the Hardware.
Minimal Bring-Up Firmware
You may not need complete product firmware.
Start with:
rail status
clocks
memory
peripheral tests.
Software Can Be an Engineering Instrument.
Hardware Test Firmware
Dedicated engineering firmware can exercise:
without full application complexity.
Separate Hardware Validation From Product Software Complexity.
Known Pattern
Memory/interface testing can use controlled data patterns.
Deterministic Stimulus Makes Debugging Easier.
100 — Loopback
Where architectures support it, loopback can isolate:
transmitter
receiver
channel.
Divide the Communication Path.
101 — Firmware Logging
Timestamp:
initialization
errors
state changes.
Make the Prototype Explain What It Thinks Is Happening.
102 — Assertion
Development firmware can detect:
Impossible State.
Do not silently continue through corruption.
103 — Reset Cause
Record:
watchdog
software
power-related causes
where supported.
Every Unexpected Reboot Is Evidence.
104 — Fault Handler
Capture sufficient engineering context where architecture permits.
Turn Crashes Into Data.
105 — Hardware / Firmware Boundary
A failure can originate from:
or:
Firmware.
Prototype debugging should distinguish them systematically.
106 — Replace Firmware With Known-Simple Test
If issue disappears:
Application Complexity May Matter.
107 — Replace Hardware Input With Known Stimulus
If issue remains:
Sensor / upstream physics may not be cause.
108 — Substitution as Isolation
Use known-good:
module
cable
where appropriate to isolate failure domain.
Diagnostic Replacement Should Test a Hypothesis.
109 — Boundary Isolation
Break system into:
Output.
Find the First Point Where Reality Diverges From Expectation.
110 — Debug From Evidence
Not:
“I think it's EMI.”
Measure.
111 — Prototype BOM
The prototype BOM may differ from final production BOM.
Reasons:
lead time
sample availability
preliminary choices.
Prototype Parts Must Be Identified as Prototype Parts.
112 — Engineering Substitution
If a substitute component is used:
Record It.
Because its behavior may differ.
113 — Do Not Qualify the Product on the Wrong BOM
A prototype can work perfectly using:
while production uses another part.
Validation Must Eventually Converge to Approved Production BOM.
114 — BOM Risk
Prototype period is a good time to identify:
long lead time
lifecycle
sole-source.
Supply-Chain Risk Is Engineering Risk.
115 — Alternate Component
Test important alternates before emergency production if lifecycle strategy requires them.
Approved Alternate Should Be Verified — Not Assumed Equivalent.
116 — Component Revision
Some silicon goes through:
silicon revisions
firmware revisions.
“Same MPN” May Still Have Important Product Context.
117 — Errata
Prototype bring-up should review current device errata where relevant.
The Datasheet Is Not the Entire Silicon Story.
118 — Prototype Assembly
Engineering samples may require:
careful assembly
special handling.
But:
Do Not Make Them So Hand-Crafted That Production Can Never Reproduce Them.
119 — Hand Assembly Risk
A hand-tuned prototype can hide:
stencil
placement
reflow
issues.
Production Process Must Eventually Build the Proof.
120 — Production-Like Assembly
As design matures:
use more representative:
stencil
paste
reflow
placement.
Prototype Fidelity Must Progress Toward Manufacturing Reality.
121 — Assembly Standards
IPC's current 2024 releases include J-STD-001J for soldered electrical/electronic assemblies and IPC-A-610J for electronic-assembly acceptability. Prototype samples intended to inform future production should be reviewed with the relevant intended manufacturing/acceptance framework in mind rather than inventing a completely separate “prototype quality” universe.
Prototype Learning Should Transfer Into Production Quality.
122 — Prototype Inspection
Depending on project risk, engineering sample inspection may include:
visual
electrical test.
Inspection Generates Debug Information Too.
123 — X-Ray
A BGA problem may appear as:
software won't boot.
X-Ray may reveal:
Assembly Physics.
124 — SPI
Poor solder paste print can create:
Electrical Symptoms Far Downstream.
125 — AOI
Wrong orientation/component can look like:
Circuit Design Failure.
126 — Manufacturing Defect vs Design Defect
Prototype teams must distinguish:
All correctly built boards fail similarly.
Specific units deviate.
The Correct Corrective Action Depends on Which One It Is.
127 — Manufacturing Variation Can Reveal Fragile Design
If small process variation causes functionality failure:
The Design Margin May Be Too Small.
128 — “Factory Made It Wrong” Is Sometimes Incomplete
Ask:
Why was the design so sensitive to this variation?
Robust Design and Process Control Meet at the Prototype.
129 — Design Margin
A robust product should tolerate:
expected component
manufacturing
environment
variation.
Prototype Should Search for Margin — Not Only Nominal Function.
130 — Margin Testing
Vary relevant:
supply
temperature
load
timing
within qualified development boundaries.
Find the Edge Before the Customer Does.
131 — Do Not Turn Engineering Margin Testing Into Unsafe Improvisation
High-energy, mains, battery, thermal, or mechanically hazardous systems require controlled facilities, approved procedures, and appropriately qualified personnel.
Prototype Learning Never Justifies Unsafe Testing.
132 — Temperature Margin
A product working at room temperature proves:
Room-Temperature Operation.
133 — Voltage Margin
A product working with ideal bench supply proves:
Ideal Bench Supply Operation.
134 — Battery Prototype
Real battery creates:
source impedance
voltage variation.
Product Power Source Is Part of the Prototype.
135 — Cable Prototype
Actual cable creates:
resistance
noise
signal properties.
Cable Is Part of the System.
136 — Enclosure Prototype
Open bench operation may cool much better than:
Closed Housing.
137 — Final Antenna Environment
Antenna without:
housing
battery
display
is not final RF environment.
Prototype the Whole Electromagnetic Neighborhood.
138 — Mechanical Load
A board lying flat on a bench is not:
Mounted Product.
139 — Real Mounting
Mounting can alter:
stress
thermal
sensor behavior.
Fixture the Product Like the Product.
140 — Production Fixture
Development may need temporary fixtures for:
measurement
positioning
repeatability.
Test Fixture Is Part of Experiment Quality.
141 — Repeatable Mechanical Setup
If every engineer holds the sensor at a different angle:
Data Is Not Comparable.
142 — Test Automation
Repeated tests can be automated where valuable.
Machines Are Good at Repeating Exactly the Same Question.
143 — Automated Regression
Each firmware/hardware revision can rerun:
key functional tests.
Prototype Progress Should Not Reintroduce Old Failures.
144 — Hardware-in-the-Loop
HIL can exercise real hardware against controlled:
stimuli
interfaces
where appropriate.
Automate the Environment Around the Device.
145 — Scriptable Instruments
Development equipment can be automated to collect:
voltage
timing
current
where tooling supports it.
Measurement Automation Turns Debug Into Data.
146 — Data Capture
Do not store results only as:
Passed.
Store useful:
where appropriate.
147 — Prototype Database
For complex programs:
Board ID
Configuration
Test Result
Failure
Rework
can be structured.
Engineering Samples Can Have Digital Traceability.
148 — Traceability Begins Before Production
IPC-1782B defines risk-based manufacturing and supply-chain traceability across PCB fabrication, assemblies, parts, components and mechanical assembly. Although prototype programs may use a lighter practical level, the principle is important:
Know Which Physical Configuration Produced Which Result.
149 — Engineering Sample Label
At minimum:
should be identifiable on complex engineering hardware.
150 — Firmware Label
Also record:
Exact Firmware Build.
151 — Calibration Version
If the product uses calibration:
Which Calibration Dataset?
152 — Model Version
For Edge AI:
Which AI Model?
153 — Mechanical Revision
Which:
Housing / Bracket Revision?
154 — Prototype Is a System Configuration
Therefore:
Hardware Rev Alone Is Not Enough.
155 — Design Review After First Build
The first prototype should trigger:
A Formal Learning Review.
Ask:
What worked?
What failed?
What surprised us?
What remains unknown?
156 — Issue Classification
Separate:
Must Fix
Should Improve
Needs More Data
Production Concern
Not Every Observation Has Equal priority.
157 — Severity
A cosmetic issue:
≠
boot failure.
Prioritize by Product Risk.
158 — Root Cause
For every major failure:
Find mechanism before redesign where practical.
159 — Corrective Action
Define:
What design/process change removes the mechanism?
160 — Verification of Fix
New revision should explicitly verify:
The Previous Failure No Longer Exists.
161 — Regression Risk
A fix can create:
Another Problem.
Example:
larger capacitor solves transient.
But:
increases startup current
mechanical area.
Every Engineering Change Has Side Effects.
162 — ECO
Convert validated prototype change into:
Controlled Engineering Change.
163 — Update the Source of Truth
Update:
Schematic
PCB
BOM
Firmware
CAD
Requirements
as appropriate.
Don't Let the Prototype Become More Correct Than the Design Database.
164 — As-Built vs As-Designed
Prototype may physically differ.
Track:
As-Built Configuration.
165 — Redline
Temporary redline documentation can capture urgent changes until formal source files are updated.
Knowledge Must Not Live Only in an Engineer's Memory.
166 — Revision B
A second board revision should have:
Specific Questions It Must Answer.
Not:
We fixed some stuff.
167 — Revision Objectives
Example:
Every Spin Should Retire Named Risks.
168 — Board Spin Is Expensive Learning
Cost is not just:
PCB Price.
It includes:
engineering time
assembly
software delay
schedule.
Design the Next Spin to Maximize Information.
169 — Avoid Endless Spins
Rev A.
Rev B.
Rev C.
Rev D.
Without requirements and root cause:
Iteration Becomes Wandering.
170 — Exit Criteria
Before moving forward, define:
What evidence is required to leave prototype phase?
Development Stage Needs an Exit Condition.
171 — Prototype vs EVT
The terms POC, Alpha, EVT, DVT and PVT vary among companies and industries.
There is no single universal ISO definition that makes every company's EVT identical.
A better website approach is:
Define What 365PCB Means Operationally.
ISO/IEC/IEEE 15288:2023 deliberately provides lifecycle processes without forcing one universal development lifecycle model.
172 — Suggested 365PCB Development Language
Can the principle work?
Can the architecture work?
Can the intended product design work?
Does the near-final product satisfy defined requirements?
Can the production process repeatedly build it?
The Exact Gate Criteria Remain Project-Specific.
173 — Prototype-to-EVT Transition
Move when:
architecture stable enough
major feasibility risks retired
custom hardware functional.
EVT Should Not Still Be Asking Whether the Fundamental Product Concept Is Possible.
174 — EVT Hardware
EVT should increasingly resemble:
Product Architecture.
But may retain:
debug
instrumentation
engineering flexibility.
175 — DVT Hardware
DVT should be much closer to:
Final Production Definition.
176 — PVT Hardware
PVT should test:
Production Process + Production Product Together.
177 — Prototype Fidelity Curve
Early:
Low Fidelity / High Learning Flexibility.
Later:
High Fidelity / High Production Relevance.
Fidelity Should Increase With Confidence.
178 — Don't Use High Fidelity Too Early
Final tooling before architecture stabilizes creates:
Expensive Change.
179 — Don't Use Low Fidelity Too Late
DVT using:
hand-soldered
3D-printed substitute materials
may fail to prove production behavior.
Match Prototype Fidelity to Decision Stage.
180 — Design Freeze Is Progressive
Rather than one magical day:
“Design Frozen.”
Different domains may stabilize at different times.
181 — Interface Freeze
Freeze critical:
board outline
connectors
protocol
when enough evidence exists.
Stable Interfaces Enable Parallel Engineering.
182 — Mechanical Freeze
Don't freeze enclosure while PCB is still moving dramatically.
Freeze Dependency in the Correct Order.
183 — BOM Freeze
Production BOM needs stronger maturity than prototype BOM.
184 — Firmware Is Never Completely “Finished”
But:
A Qualified Release Must Be Defined.
185 — Requirement Traceability
Prototype findings may reveal:
The Requirement Was Wrong.
186 — Change the Requirement When Reality Changes the Product
Do not force physics to obey:
A Bad Requirement.
But document the decision.
187 — Requirement Verification Planning
For each requirement:
Which prototype/test stage will generate evidence?
Plan Evidence Before Testing.
188 — Verification vs Validation
A useful systems-engineering distinction:
Did we build the thing according to requirements/design?
Does the resulting product solve the intended user/system need?
Both Can Begin During Prototyping.
189 — User Prototype
Some product risks cannot be discovered by oscilloscope.
Examples:
installation
service
usability.
Customer Workflow Is Part of Product Reality.
190 — Installation Prototype
Can the actual technician:
mount
wire
configure
the device?
Product Success Includes Deployment.
191 — Service Prototype
Can the product be:
opened
diagnosed
repaired
as intended?
Serviceability Should Be Prototyped Too.
192 — Manufacturing Prototype
Can operators assemble it?
Engineer's Hands Are Not the Production Process.
193 — Assembly Trial
Observe:
difficult access
ambiguous orientation
excess fasteners.
The Line Can Reveal Design Problems.
194 — DFM Review
IPC explicitly describes DFM as an important product-development step and provides DFM profiles based on current design/manufacturing standards.
DFM Should Happen Before Production Tooling — and Before Every Serious Prototype Spin Where Relevant.
195 — DFA
Can it be assembled?
196 — DFT
Can it be tested?
197 — DFS
Can it be serviced?
198 — DFR
Can it achieve intended reliability?
199 — DFX
All of these are:
Design for X.
IPC-2231A remains the current listed revision of IPC's DFX Guidelines.
Prototype Should Expose DFX Problems While They Are Still Cheap to Fix.
200 — Production Test Development Starts During Prototype
Do not wait until:
to ask:
How will we test this board in production?
201 — Test Point Validation
Prototype should prove:
test access
programming access.
DFT Is Physical Architecture.
202 — Programming Time
Factory programming taking:
40 minutes per unit
may be unacceptable at production volume.
Prototype Reveals Manufacturing Cycle-Time Risk.
203 — Calibration Time
Similarly:
Calibration Process Can Become Production Bottleneck.
204 — Fixture Concept
Prototype stage can develop early:
test fixture concepts.
Production Test Is Another Product.
205 — Golden Unit for Test Development
A characterized known-good sample can help develop:
Fixture Limits.
206 — Golden Unit Must Have Known Measurements
Not simply:
Engineer says this one works.
Reference Needs Evidence.
207 — Test Limit Development
Prototype distribution helps establish:
Meaningful Limits.
208 — Don't Set Limits From One Unit
One golden sample:
Does Not Define Production Distribution.
209 — Characterization Builds
Later engineering builds can collect enough samples to understand:
variation.
Qualification Needs Population Thinking.
210 — Process Learning
Prototype assembly can reveal:
paste issue
warpage
reflow challenge.
Product and Process Mature Together.
211 — NPI Begins Before Production
New Product Introduction is not:
hand final files to factory.
It is:
The Controlled Transfer of Engineering Knowledge Into Manufacturing.
212 — Prototype Manufacturing Feedback
Factory should feed back:
to R&D.
Manufacturing Is Part of Development.
213 — Engineering Feedback Loop
Prototype Is the Physical Learning Loop.
214 — Every Build Should Make the Next Build Better
This is already consistent with365PCB's broader manufacturing philosophy.
Prototype Knowledge Should Not Be Discarded at Production Release.
215 — Manufacturing Notes
Record:
special processes
assembly difficulty
rework.
Pilot Build Should Not Rediscover Prototype Knowledge.
216 — Process Window
Prototype may reveal:
A Very Narrow Assembly Window.
That is a warning.
217 — Design for Process Margin
A robust production design should make:
Correct Manufacturing Easier.
218 — Component Availability During Prototype
Prototype may use samples.
Production needs:
Supply Continuity.
219 — Cost During Prototype
Early prototype can tolerate:
expensive temporary components
for learning.
But cost target must eventually return.
Prototype Optimizes Risk First — Production Optimizes the Complete Product.
220 — Value Engineering Comes Later — But Not Too Late
After function/margin are understood:
Remove Unnecessary Cost.
This connects Page 05.
221 — Do Not Value-Engineer Away the Thing That Made the Prototype Reliable
If prototype worked because of:
sufficient copper
good connector
robust regulator,
cutting cost blindly can remove:
Engineering Margin.
222 — Prototype Schedule
Fast iteration matters.
But:
Fast Wrong Learning Is Still Wrong.
223 — Lead Time Strategy
Long-lead components can determine prototype schedule.
Procurement Is Part of Development Planning.
224 — Parallel Work
While PCB is fabricated:
firmware can develop on evaluation hardware
mechanical can prototype enclosure
test team can prepare instrumentation.
Development Processes Can Run Concurrently.
This iterative/concurrent approach is consistent with ISO/IEC/IEEE 15288's lifecycle framework.
225 — Interface Contracts Enable Parallel Development
Hardware team defines:
Pin
Protocol
Mechanical Envelope
early enough for other teams.
Parallel Engineering Requires Stable Interfaces.
226 — Prototype Dependency Map
Know:
Which experiment depends on which hardware?
Schedule the Critical Learning Path.
227 — Prototype Decision Log
Record major decisions:
We Selected X Because Measurement Y Showed Z.
Future Engineers Need the Reason — Not Only the Result.
228 — Assumption Register
At start:
Antenna expected to achieve required range.
After test:
Confirmed / Rejected.
Track Assumptions Like Risks.
229 — Unknown Unknowns
Prototype's greatest value is sometimes discovering:
A Problem Nobody Listed.
230 — Unexpected Behavior Is Valuable
Do not hide surprises.
A Surprise in EVT Is Cheaper Than a Surprise in Production.
231 — Prototype Failure Is Not Project Failure
A prototype that exposes a critical flaw early may be:
Extremely Successful.
Because it prevented:
tooling
inventory
field failure.
232 — The Worst Prototype Is the One That “Works” for the Wrong Reason
Example:
a timing problem disappears because:
Probe loading changed the circuit.
Now false confidence grows.
Understand Why It Works.
233 — Happy Accident
A prototype may function because of:
parasitic
component tolerance
bench condition.
Success Needs Root-Cause Understanding Too.
234 — Characterize the Margin Around Success
Don't stop at:
Pass.
Ask:
How far from failure are we?
235 — Design Margin Map
For critical subsystem identify:
Nominal
Requirement Boundary
Measured Boundary
Margin Can Be Visualized.
236 — Prototype Reliability
Prototype is not normally the final evidence for full lifecycle reliability.
But it can identify:
weak areas.
Early Reliability Testing Retires Major Risks.
237 — HALT / Accelerated Testing Direction
Accelerated engineering methods may be appropriate for selected projects under qualified reliability programs.
But:
They Must Be Designed for the Product and Interpreted by Qualified Reliability Engineers.
Do not market one generic stress test as universal proof of lifetime.
238 — Environmental Pre-Screen
Early samples may experience selected:
temperature
vibration
tests to reveal architectural weakness.
Find Weakness Before DVT.
239 — Destructive Prototype
Some samples should be expected to:
Never Return.
Examples:
cross-section
destructive reliability analysis.
Allocate Samples for Learning.
240 — Teardown
Opening a tested prototype can reveal:
wear
movement
thermal interface.
Post-Test Inspection Can Explain Test Results.
241 — Cross-Section
For selected interconnect issues:
solder joint
cross-section can reveal physical structure.
Sometimes the Answer Is Inside the Material.
242 — Failure Analysis
Prototype failure analysis may include:
Electrical
Mechanical
Thermal
Manufacturing
evidence.
Use the Failure to Improve the Design System.
Best outcome:
Failure:
teaches a reusable rule.
Example:
This connector needs mechanical support.
Now future projects benefit.
Prototype Knowledge Should Become Organizational Knowledge.
Add the discovered mechanism to:
design review
test
checklists.
Don't Pay Twice for the Same Lesson.
245 — Prototype Knowledge Base
Over time:
Issues
Fixes
Measurements
Process Lessons
can become:
R&D Intellectual Capital.
246 — This Is Important for365PCB's Technology Institute
Your Advanced Manufacturing Technology & Reliability system should learn from:
Field.
One Continuous Learning System.
247 — Prototype Should Connect to Manufacturing Data
The prototype is not a separate universe.
Its information should eventually inform:
work instructions
control plans
test limits.
Development Data Should Become Production Knowledge.
Engineering sample:
can eventually become the model for:
Production Serial-Level Configuration Control.
249 — Physical Digital Thread
Potential chain:
Every Engineering Decision Can Be Linked to Physical Evidence.
250 — Model-Based Development + Prototype Evidence
Simulation predicts.
Prototype measures.
The strongest development process uses both.
251 — Simulation Does Not Eliminate Prototypes
Better models reduce:
Number of Blind Prototypes.
They do not remove the need for:
Physical Correlation.
252 — Prototype Does Not Eliminate Simulation
Building repeatedly without modeling can become:
Expensive Trial and Error.
253 — Best Practice
Model First Where It Adds Value.
Prototype Where Uncertainty Remains.
Measure the Difference.
Improve Both.
254 — What Does World-Class Prototype & Engineering Sample Development Look Like?
At the highest level:
That is the difference between:
and:
Engineering Prototypes.
Depending on project requirements, a 365PCB ODM prototype program may include:
Prototype Strategy
Prototype Development Plan
Engineering Risk Register Inputs
Critical-Assumption Identification
Prototype Objective Definition
Prototype Exit Criteria
Proof-of-Concept Development
Architecture Prototype
Electronic POC
Evaluation-Board Integration
Custom Adapter Boards
Daughterboard Development
Circuit-Level Prototype
Analog Prototype
Sensor Prototype
RF Prototype
Antenna Prototype Inputs
Power Prototype
Motor-Control Prototype Inputs
Embedded Hardware Prototype
FPGA Prototype
Edge AI Prototype Inputs
IoT Prototype Inputs
Mechanical Mock-Up
3D-Printed Prototype
CNC Prototype
Sheet-Metal Prototype
Functional Mechanical Prototype
Product Fit Prototype
PCB Prototype
Prototype Schematic
Prototype PCB Layout
Prototype Stack-Up
Prototype Manufacturing Review
Prototype BOM
Alternate-Part Inputs
Prototype Component Sourcing
PCB Fabrication
Engineering Sample Assembly
Prototype SMT Inputs
Prototype Inspection
SPI Inputs
AOI Inputs
X-Ray Inputs
First Article Inspection
Prototype Serial Numbering
Engineering Sample Traceability
Prototype Configuration Control
Prototype Firmware Build
Bring-Up Firmware
Manufacturing Test Firmware Inputs
PCB Bring-Up Plan
Bring-Up Checklist
Bring-Up Log
Power-Rail Validation
Clock / Reset Validation
MCU / SoC Bring-Up
FPGA Bring-Up
DDR / Memory Bring-Up Inputs
Interface Bring-Up
UART / SPI / I²C / CAN / Ethernet Bring-Up
Sensor Bring-Up
RF Bring-Up Inputs
Test-Point Architecture
Debug Interface Architecture
Development Instrumentation
Measurement Provisions
Current Measurement Inputs
Engineering Jumpers
Development Configuration Options
DNP / Alternate-Value Strategy
Engineering Rework
Rework Documentation
IPC-7711/21D-Based Rework Inputs
Hardware Modification Control
Prototype As-Built Records
Failure Capture
Failed-Sample Preservation
Debug Log Collection
Measurement Data Capture
Oscilloscope Measurement Inputs
Logic Analyzer Inputs
Protocol Analyzer Inputs
Electrical Characterization
Power Characterization
Thermal Characterization
RF Characterization Inputs
SI Measurement Inputs
Sensor Characterization
Mechanical Fit Validation
Interface Alignment Validation
Model / Measurement Correlation
SPICE Correlation Inputs
SI Correlation Inputs
Thermal Simulation Correlation
Mechanical Simulation Correlation
RF Simulation Correlation
Design Experiment Planning
DOE Inputs
Margin Testing Inputs
Voltage-Margin Inputs
Temperature-Margin Inputs
Load-Margin Inputs
Failure-Reproduction Plan
Hardware / Firmware Fault Isolation
Root-Cause Analysis
Corrective Action Inputs
Prototype ECO
Schematic Revision
PCB Revision
BOM Revision
Firmware Revision
Mechanical Revision
Regression Testing
Hardware Regression
Firmware Regression
Prototype Test Automation
HIL Inputs
Automated Instrumentation Inputs
Data Logging
Prototype Test Database Inputs
Golden-Sample Characterization
Known-Bad Reference Inputs
DFM Review
DFA Review
DFT Review
DFS / Serviceability Review Inputs
DFR Inputs
IPC-2231A DFX Inputs
Production Test-Point Review
Programming-Time Inputs
Calibration-Time Inputs
Fixture Concept Development
Manufacturing Trial Inputs
Prototype Assembly Feedback
Process-Window Inputs
Production-BOM Convergence
Supply-Chain Risk Inputs
Alternate-Component Validation
Product Configuration Matrix
PCB / Mechanical Compatibility Matrix
Requirement Verification Inputs
Prototype Validation Inputs
EVT Readiness Review
EVT Sample Preparation
Prototype-to-EVT Transition
Prototype Release Package
Engineering Sample Report
Issue Tracker
Design Decision Log
Assumption Register
Prototype Learning Report
Manufacturing Feedback Report
Prototype Traceability Inputs
IPC-1782B Traceability Inputs
Prototype Digital-Thread Inputs
NPI Knowledge Transfer Inputs
Prototype Failure Analysis
Cross-Section Analysis Inputs
Reliability Pre-Screen Inputs
Environmental Pre-Screen Inputs
Long-Duration Functional Testing Inputs
Prototype Documentation
Prototype Architecture Documentation
The actual engineering depth should follow:
Technical Uncertainty + Product Complexity + Cost of Failure + Hardware Novelty + Manufacturing Risk + Schedule + Reliability Requirement.
You can begin with:
Product Idea
System Architecture
Schematic
Existing Prototype
Gerber
PCB Layout
Firmware
Mechanical CAD
Evaluation Board
Sensor Data
Test Results
Failed Prototype
Engineering Questions
or simply:
Tell Us What You Need the Next Prototype to Prove.
365PCB can help translate:
Don't Just Make a Sample.
Define the Risk.
Define the Question.
Select the Right Prototype.
Make the Hardware Observable.
Build With Controlled Configuration.
Bring It Up Systematically.
Measure the Real Signals.
Capture the Failures.
Rework Intentionally.
Verify the Hypothesis.
Characterize the Margin.
Correlate Simulation With Reality.
Update the Controlled Design.
Verify the Fix.
Preserve the Learning.
Increase Production Fidelity With Every Stage.
Transfer the Knowledge Into NPI.
Make Every Build Better Than the Last.
365PCB Prototype & Engineering Sample Development connects:
Requirements + Architecture + PCB + Firmware + Mechanical + Thermal + RF + AI + Measurement + Manufacturing + Failure Analysis
into one coordinated engineering-learning process.
The Purpose of a Prototype Is Not to Look Like the Final Product.
It Is to Reduce the Most Important Engineering Uncertainty as Early and as Economically as Possible.
And:
A Prototype Converts Uncertainty Into Evidence.
[Discuss Your Prototype Strategy]
[Submit Your Engineering Design]
[Request a Prototype Engineering Review]
 English